Adding MFA to an existing app typically means new backend routes, session state changes, SDK integrations, and a coordinated deploy with whoever owns the auth layer. For most apps, that's a solved problem. The friction shows up when you're working with:
- A legacy internal tool on a framework nobody wants to touch, where adding auth logic means weeks of archaeology before you write a single line
- A SaaS product that just had a credential stuffing incident and security wants MFA across all accounts by end of week, not end of quarter
- A third-party app running behind CloudFront where you simply don't have access to the source
With AWS Lambda@Edge and Authsignal, you can add adaptive, risk-based MFA at the CloudFront layer - no changes to your origin required. Three edge functions intercept the login flow, call Authsignal for a risk decision, and either pass the request through or redirect to MFA. The origin app doesn't get modified. It doesn't even know this is happening.
Prerequisites
- AWS account with permissions to create Lambda functions and CloudFront distributions
- AWS SAM CLI
- Authsignal account - Retrieve your API secret from Settings > API Keys.
How it works
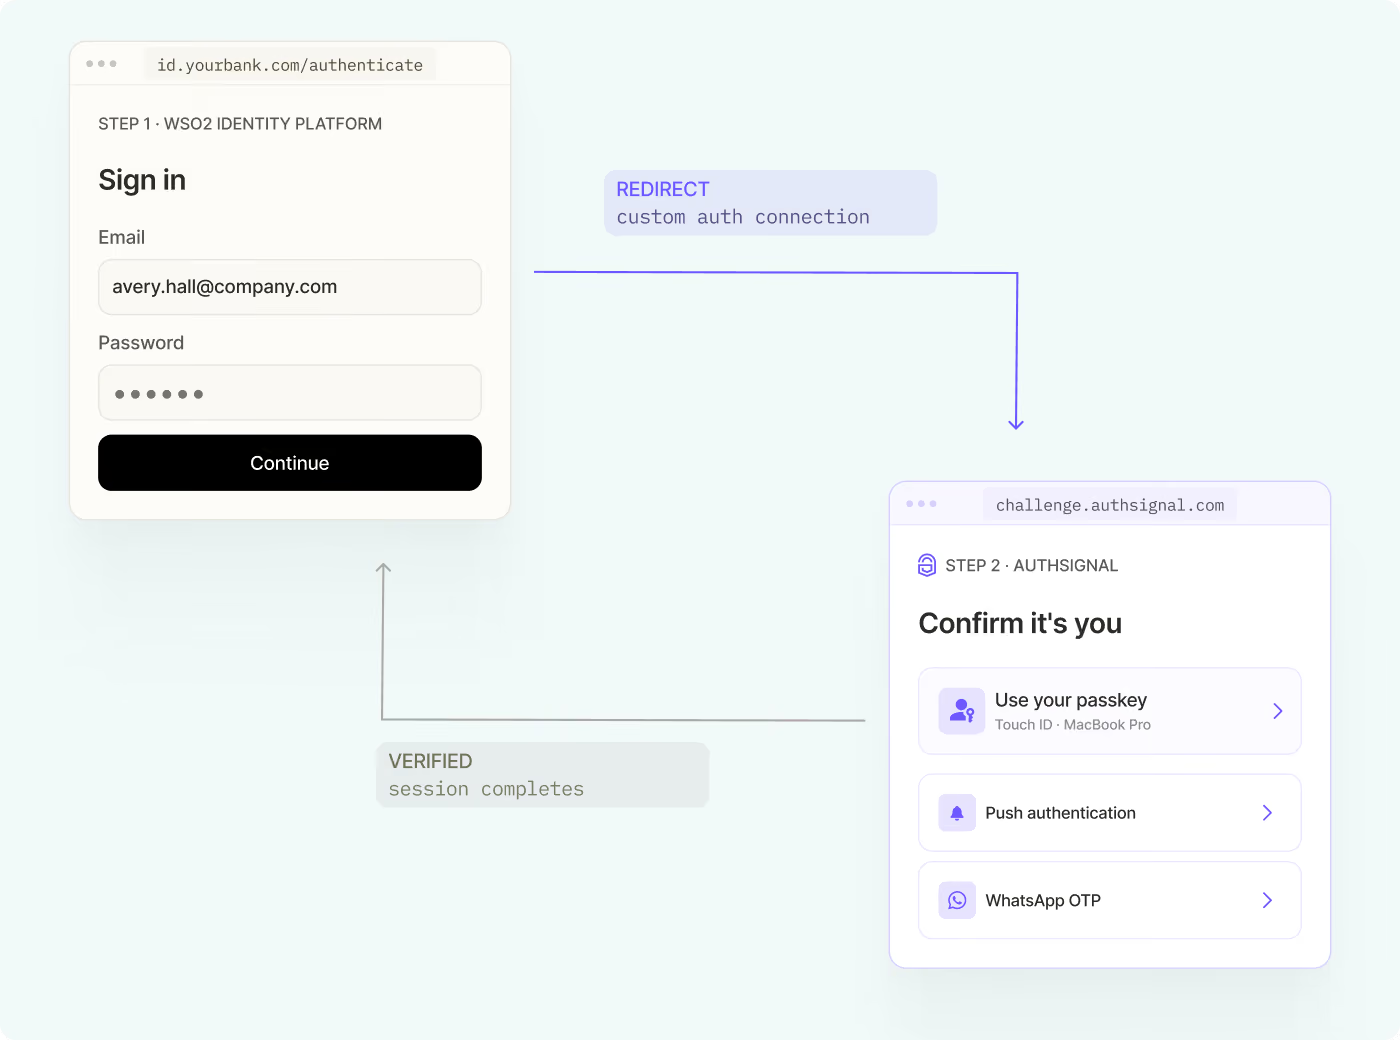
Three Lambda@Edge functions attach to a CloudFront distribution. Each runs at a different stage of the request lifecycle.
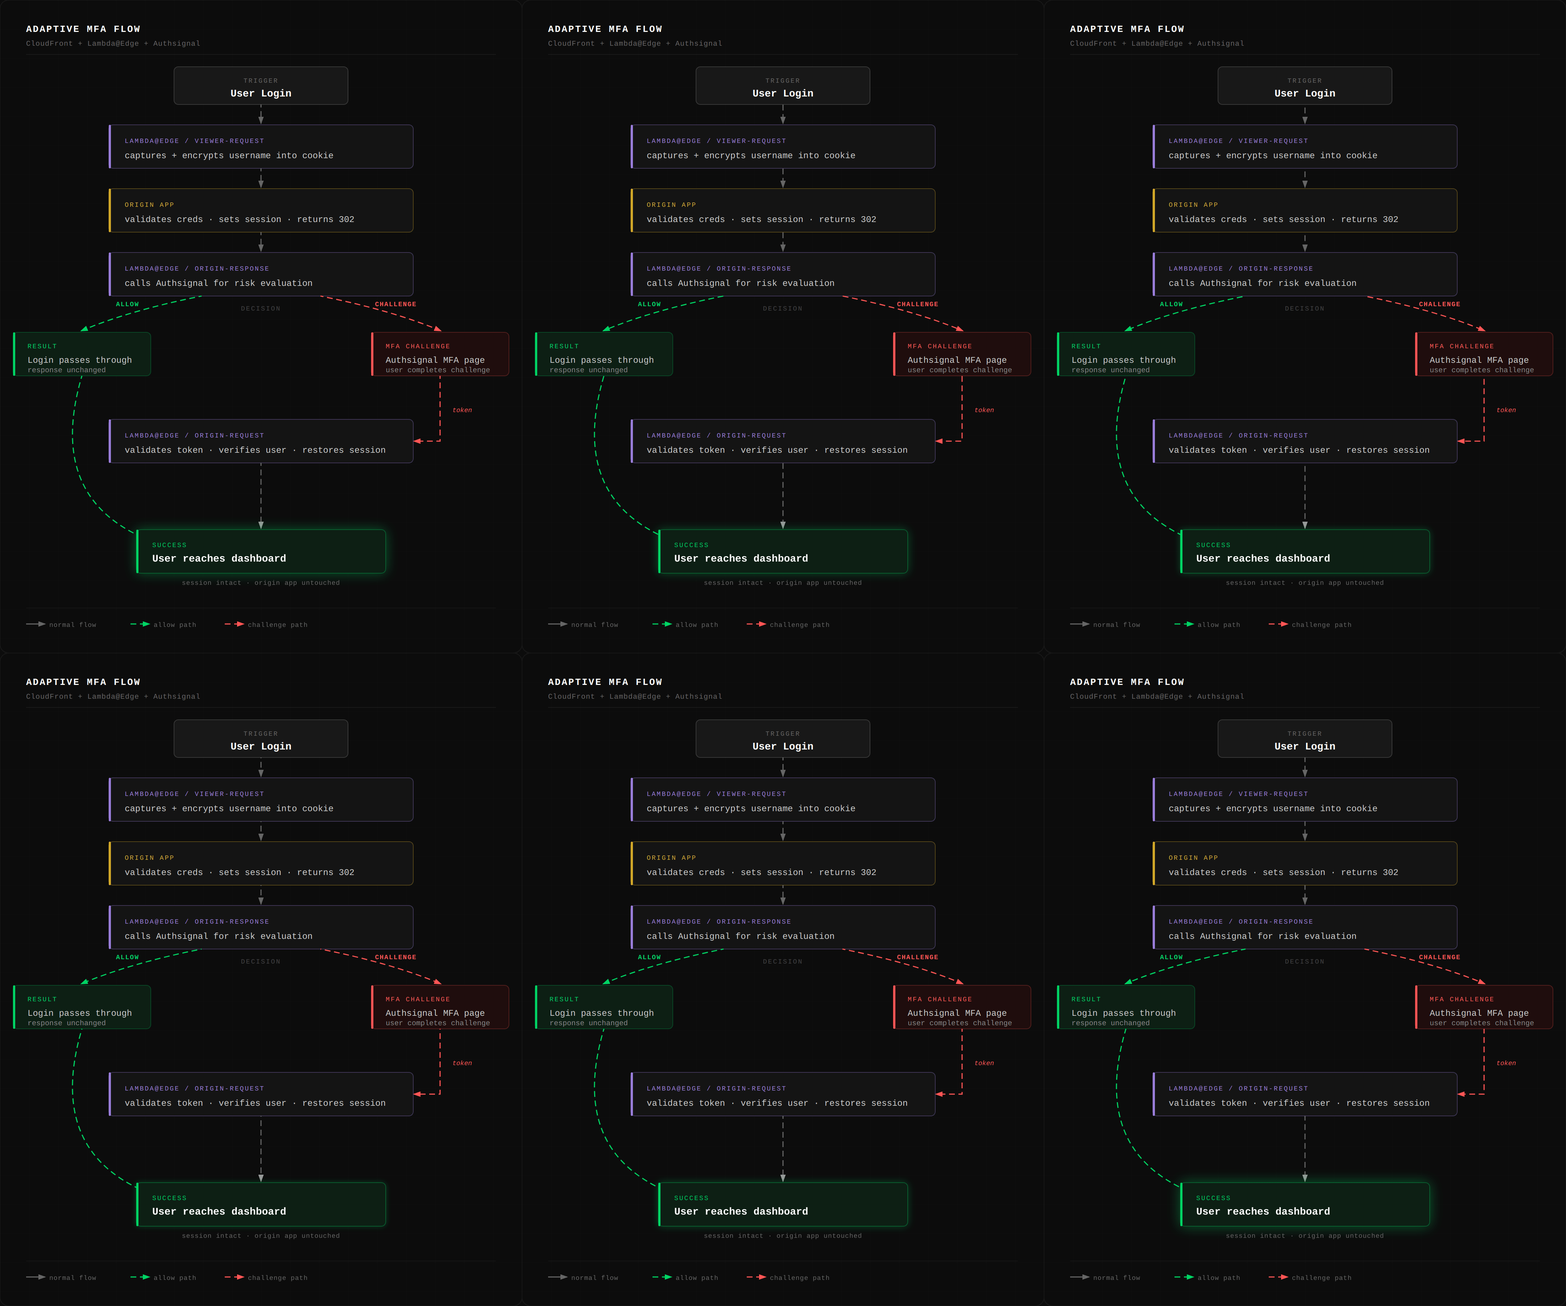
The flow:
- User submits email and password via a standard login form.
- Viewer request intercepts the POST, extracts the username, encrypts it, and stores it in a cookie.
- The origin processes the login normally: validates credentials, sets a session cookie, returns a 302 redirect.
- Origin response intercepts the 302, decrypts the username, and calls the Authsignal API to evaluate risk.
- If
ALLOW: the response passes through unchanged. - If
CHALLENGE_REQUIRED: the function preserves the original session state in an encrypted cookie and redirects to Authsignal's MFA page. - After the user completes the challenge, Authsignal redirects back with a token.
- Origin request intercepts the callback, validates the token, verifies the user and idempotency key, restores the original session cookies, and redirects to the dashboard.
No code changes required in the origin application
Please note that: Lambda@Edge functions can't use environment variables, and they can't share in-memory state - each function runs independently at the edge. The only channel for passing state between them is cookies. That's why there's an encryption layer: all sensitive state (usernames, session cookies, challenge metadata) gets encrypted before it goes into a cookie, and decrypted on the other side.
Step 1: Shared utilities
Lambda@Edge functions cannot use environment variables. Configuration is hardcoded in lambdas/shared/config.js:
Replace the placeholders with your Authsignal secret and generated encryption keys before deploying.
Encryption helpers in lambdas/shared/crypto.js:
Output is URL-encoded so it's safe to drop directly into a cookie value.
Cookie parser for CloudFront's header format in lambdas/shared/cookies.js:
CloudFront headers are arrays of { key, value } objects rather than plain strings. rest.join('=') handles cookie values that themselves contain = characters, which is common with base64-encoded data.
HTTPS request helper in lambdas/shared/http.js. Lambda@Edge doesn't support external npm dependencies at the edge, so this uses Node's built-in https module:
Step 2: Viewer request function
This function fires on every incoming request before it reaches the origin. For login POSTs, it extracts the username from the form body and stashes it in an encrypted cookie so the origin response function can use it later.
lambdas/viewer-request/index.js:
Two things worth calling out here. First, X-Forwarded-Host is set on every request, not just login POSTs. This is because CloudFront's AllViewerExceptHostHeader policy (used in the SAM template) replaces the viewer's Host header with the origin domain. Without preserving the original, the origin response function can't build a correct redirect URL for Authsignal. Second, POST body encoding isn't guaranteed: CloudFront can deliver it as plain text or base64 depending on the content, so both cases need handling.
Step 3: Origin response function
This is where the actual risk decision happens. It intercepts successful login responses (302 from POST /login/password), calls Authsignal with the user's IP and context, and either lets the response through or swaps it for a redirect to MFA.
lambdas/origin-response/index.js:
When Authsignal returns ALLOW, the original 302 passes through as-is and the temporary username cookie gets cleared. Clean exit.
When it returns CHALLENGE_REQUIRED, the function does something important: it saves the origin's session cookies (the ones the origin just set on the 302) into the encrypted auth_challenge cookie, along with the redirect destination and idempotency key. Then it builds a new 302 that sends the user to Authsignal's MFA page instead. The redirectUrl in the API call is set to /login/password so Authsignal knows where to send the user back after they complete the challenge.
Step 4: Origin request function
This function handles the return leg after MFA. Authsignal redirects back to /login/password?token=..., and this function intercepts that GET request, validates the token, and restores the session.
lambdas/origin-request/index.js:
Three checks must all pass before the session is restored: the challenge state must be CHALLENGE_SUCCEEDED, the idempotency key must match what was stored in the cookie (preventing replay attacks), and the userId must be the same person who initiated the login. If any of them fail, the user gets a 403 and the challenge cookie is cleared.
On success, the function builds a 302 that sets all the session cookies saved earlier (from the origin's original response) and sends the user to their original destination. From the user's perspective, it's just a login.
Step 5: Demo origin app
The demo uses a minimal Express.js app as the origin. It accepts any email/password combination and sets a session cookie. This is intentionally stripped down so it's easy to see the boundary between the origin and the edge logic. In production, you'd point the CloudFront distribution at your existing login application and remove this entirely.
Key routes in origin-app/index.js:
Step 6: SAM template
The template creates everything: the origin Lambda and API Gateway, the three Lambda@Edge functions, IAM roles, and the CloudFront distribution.
template.yaml:
The four things to note here matter here:
EdgeLambdaRoleneeds to trust bothlambda.amazonaws.comandedgelambda.amazonaws.com. Miss one and deployment fails.AutoPublishAlias: livecreates a new versioned ARN on every deploy and wires it to CloudFront automatically. Lambda@Edge requires versioned functions, not$LATEST.IncludeBody: trueon the viewer request association is what lets the function read the POST body. Without it,event.Records[0].cf.request.bodyis empty.CachePolicyId: 4135ea2d-...is the AWS-managedCachingDisabledpolicy. Login flows must never be cached.
Step 7: Deploy and test
Install dependencies:
Ensure lambdas/package.json exists with CommonJS mode (Lambda@Edge requires it):
SAM will prompt for a stack name and confirm IAM role creation. The CloudFront distribution takes 5-10 minutes to provision. The CloudFront URL appears in the stack outputs once it's ready.
Configuring Authsignal rules
By default, Authsignal returns ALLOW for all sign-ins. To trigger MFA:
- Open portal.authsignal.com
- Navigate to Actions and create the signIn action
- Add a rule that returns Challenge (for testing, you can challenge all sign-ins)
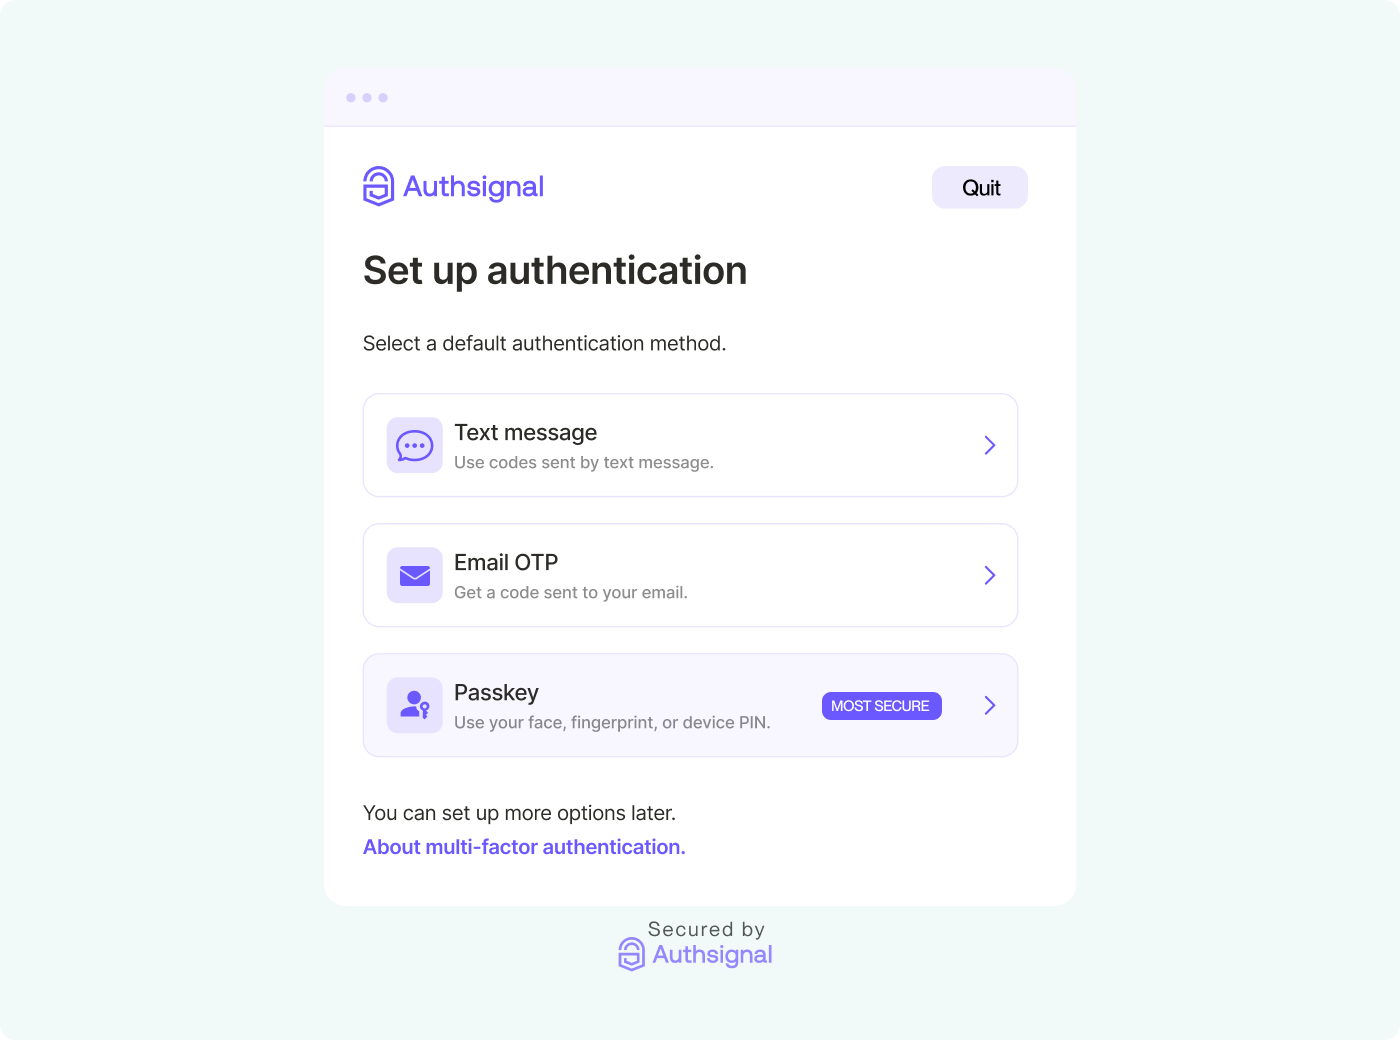
- Enable at least one verification method (email OTP, passkey, or TOTP)
Sign in through the CloudFront URL. You'll be redirected to Authsignal's challenge page. Complete verification, and you land on the dashboard with your session intact. The origin app saw none of it.