Conditional UI is a WebAuthn feature that lets users sign in with passkeys directly from the browser's autofill menu. Instead of adding a separate "Sign in with passkey" button, passkeys appear alongside saved passwords in the same familiar dropdown.
Let’s break it down to see how conditional UI improves the passkey experience, why it matters and how to implement it in Authsignal.
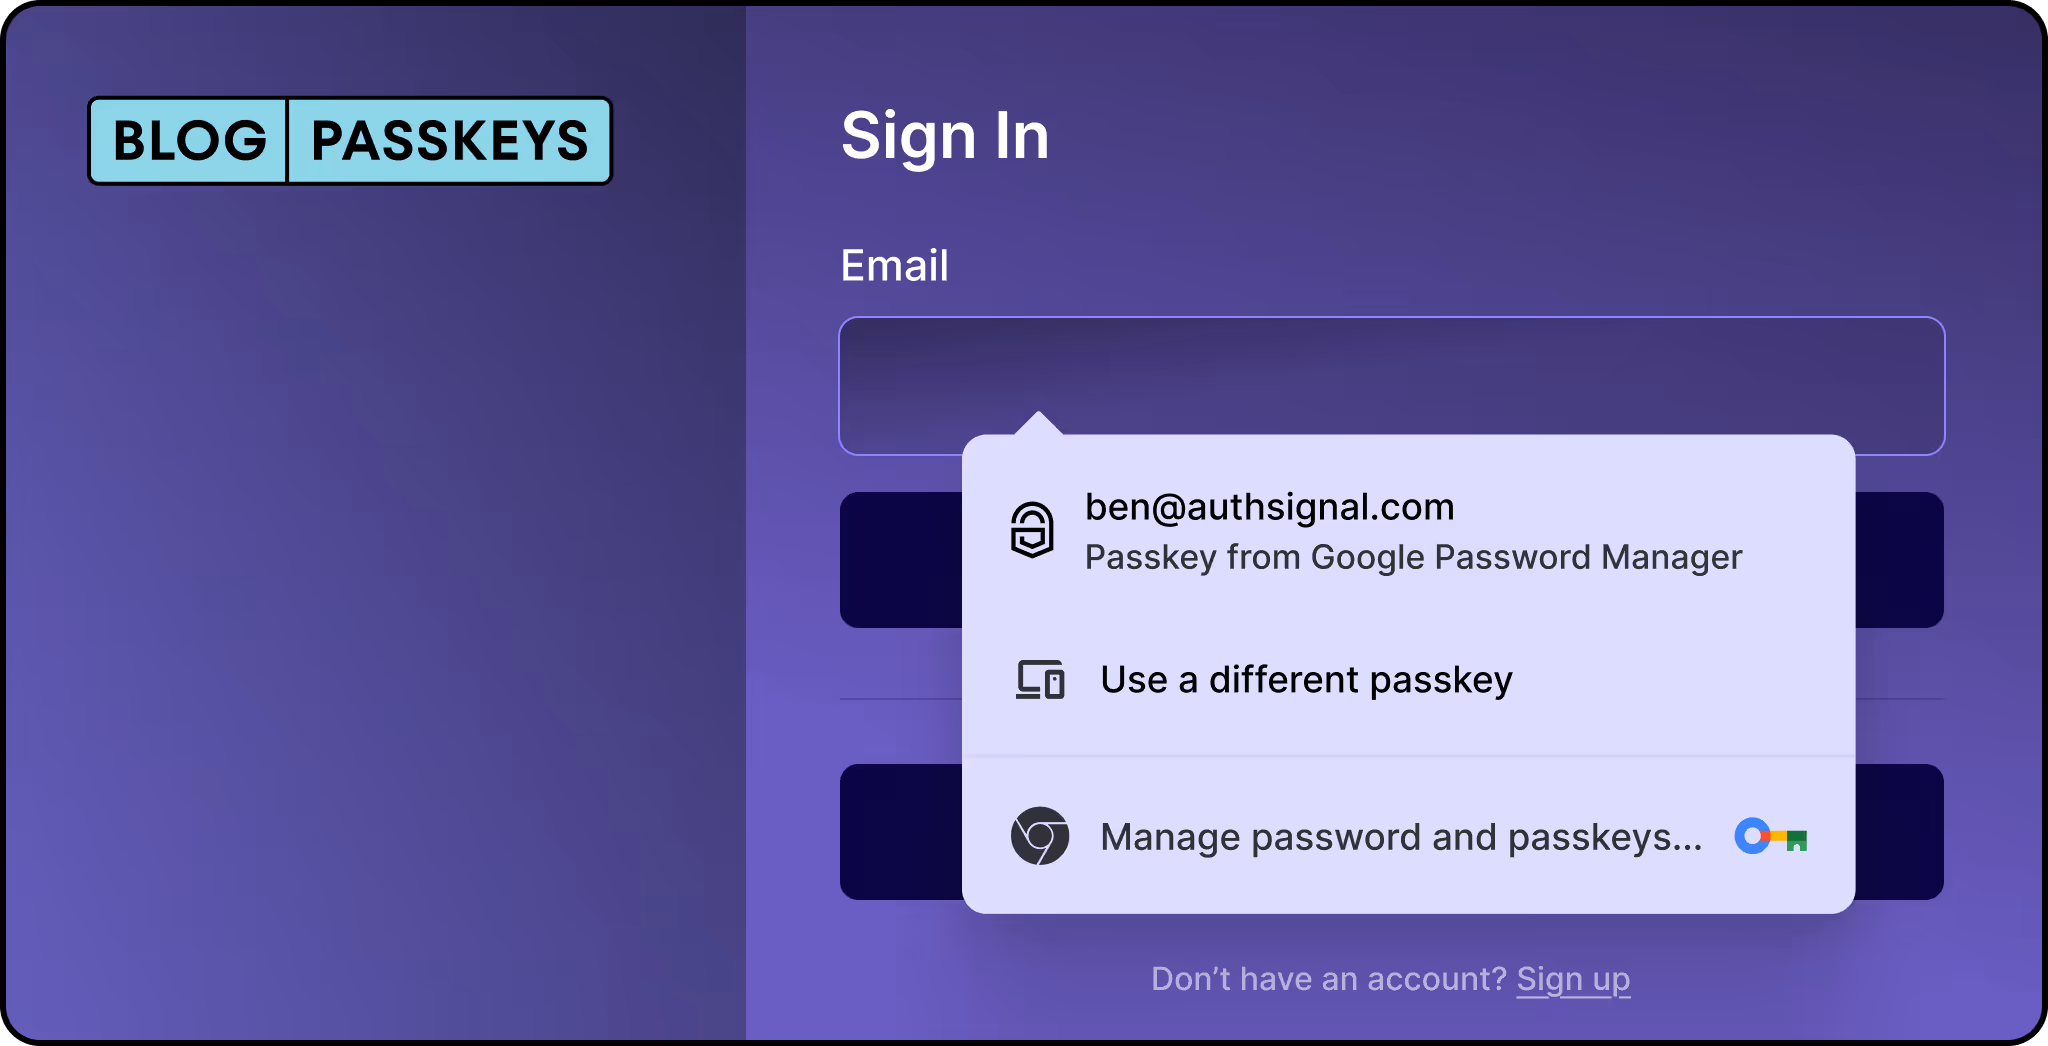
What is conditional UI?
.png)
Conditional UI (aka "passkey autofill" or "conditional mediation") is a WebAuthn feature that displays passkey options directly in your browser's autofill dropdown, right alongside saved passwords. Instead of showing a separate passkey login button that might confuse users who don't have passkeys set up, the browser intelligently surfaces passkey options only when they're available.
Here's what makes this powerful: when a user clicks into a username or password field, they see their passkey appear as an autofill suggestion. If they have a passkey, great, they can use it. If not, they simply continue with their password as usual. No modal dialogs, no error messages, no dead ends.
The problem it solves
Before conditional UI, you either had to:
- Show a "Sign in with passkey" button to everyone (confusing for users without passkeys)
- Remember who has passkeys and conditionally show the button (complex state management)
- Ask users to choose their authentication method upfront (adds friction)
None of these options are great. The first approach leads to error modals when users without passkeys click the button. The second requires extra infrastructure. The third assumes users remember how they set up their account.
Conditional UI sidesteps all of this by integrating passkeys into the existing password flow. Users see both options in the same familiar autofill interface, making the transition from passwords to passkeys feel natural rather than disruptive.
How it works
When you implement Conditional UI, two things happen:
- Your input field gets a special
autocompleteattribute that tells the browser to include passkeys in its autofill suggestions - Your JavaScript initiates a WebAuthn request with
mediation: 'conditional', which waits quietly in the background until the user interacts with the autofill menu
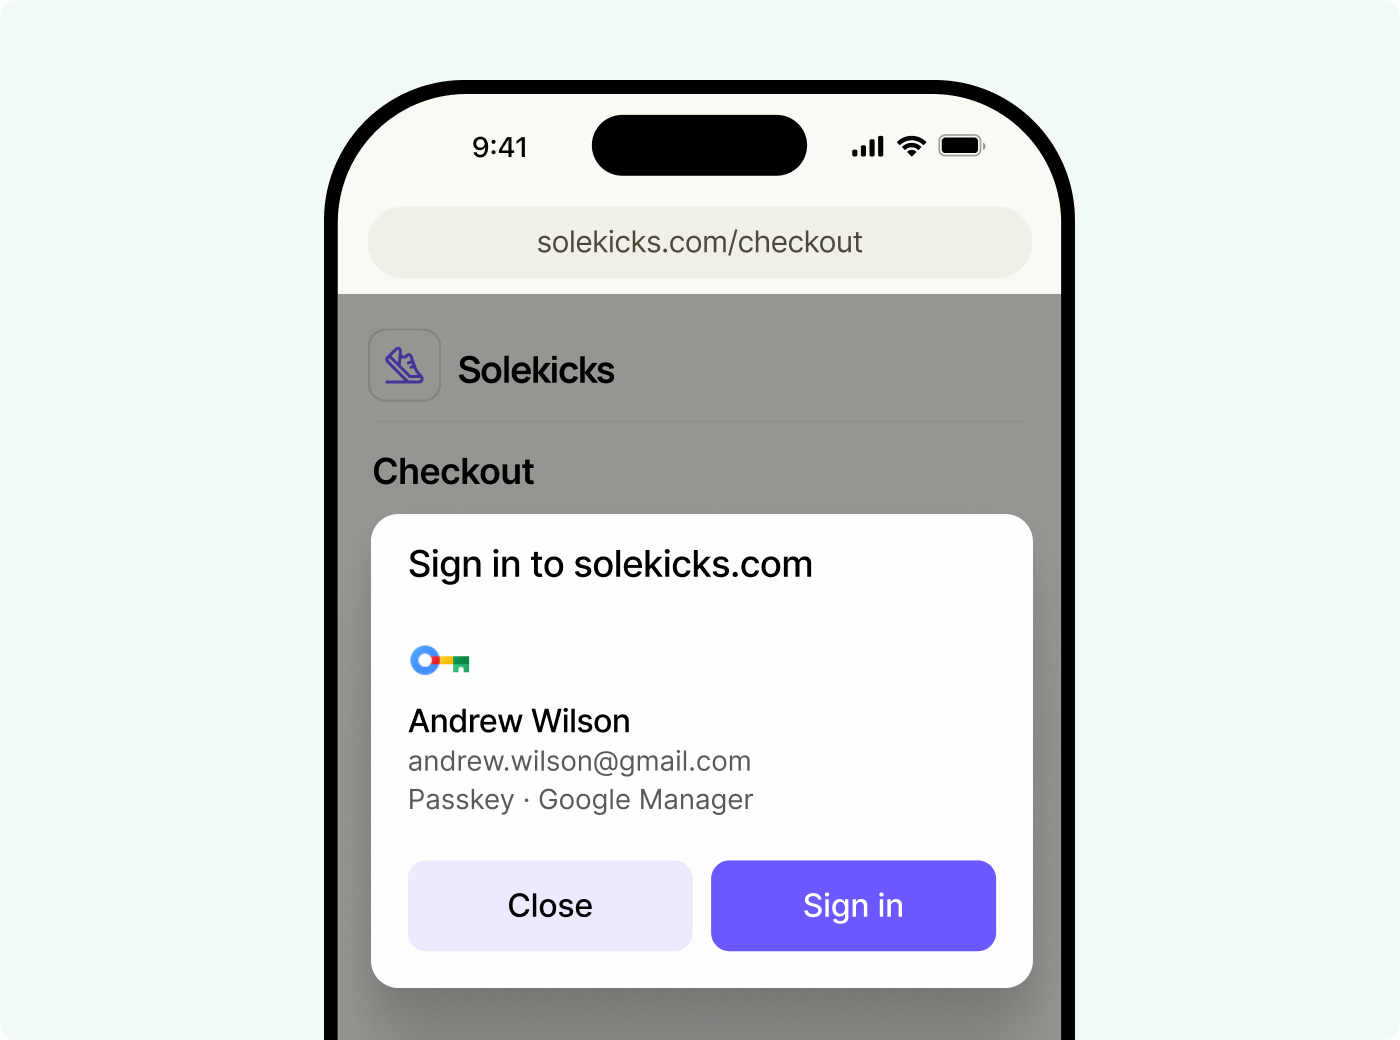
The browser handles the rest. It checks if the user has any passkeys registered for your site, and if so, shows them alongside saved passwords. When the user selects a passkey, the browser triggers the platform authenticator (Face ID, Touch ID, Windows Hello, etc.) for verification.
Implementing conditional UI with Authsignal
Authsignal's web SDK makes this simple. Here's how to set it up.
Step 1: Set up your input field
Add the webauthn token to your input's autocomplete attribute. The webauthn token must come last:
You can also add it to a password field:
Step 2: Initialize passkey autofill
When your page loads, call the signIn method with autofill: true:
That's the core implementation. When a user focuses on your input field and selects a passkey from the autofill dropdown, the promise resolves with a token you can validate server-side.
Step 3: Server-side validation
Send the returned token to your backend and use Authsignal's server SDK to validate the challenge:
Handling the non-passkey flow
One of the beautiful things about Conditional UI is that you don't need to handle the case where a user doesn't have a passkey. The autofill simply won't show passkey options for users who haven't registered one, and they'll continue with their normal password flow.
Your existing login form works exactly as before. You're just adding a parallel path for passkey users without disrupting the experience for everyone else.
Browser support
Conditional UI is supported across all major browsers:
- Safari
- Chrome
- Edge
- Firefox
That covers the entire modern browser landscape. For the small number of users on older browser versions, the passkey autofill option won't appear, and they'll use passwords as usual.
You can check for support programmatically:
Simplifying the transition
Initialize early: Call the autofill initialization as soon as your page loads. This gives the browser time to check for available passkeys before the user interacts with your form.
Keep your form simple: Conditional UI works best with standard username/password forms. Complex multi-step flows might interfere with the autofill behavior.
Prompt for passkey creation after password login: Once a user signs in with a password, consider prompting them to create a passkey for next time. Authsignal supports automatic passkey upgrades that can make this even smoother.
Getting started
Conditional UI lets users discover passkeys without changing your existing login flow. Users see passkey options alongside traditional methods, so they can adopt passwordless authentication at their own pace.
For developers, this means no redesign required. Add a few lines of code, update some HTML attributes, and passkeys are live. For users, it's a gradual transition with no learning curve.
Check out passkey documentation for the complete API reference and additional implementation details.
.png)