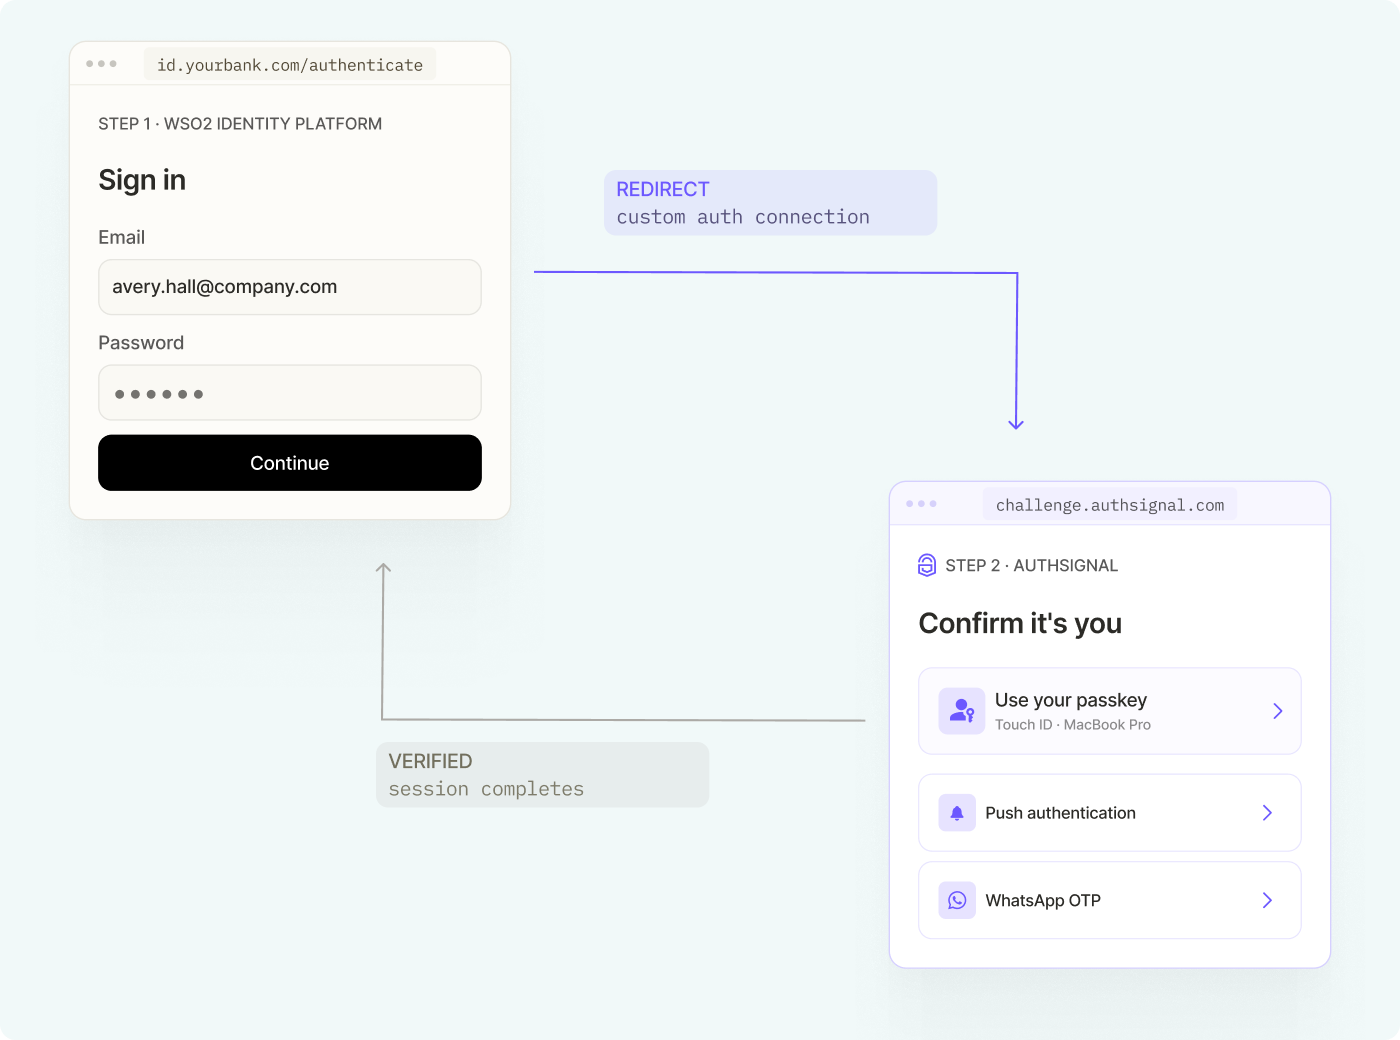
If your application already uses WSO2 Identity Platform, you can add Authsignal as a second authentication step in your existing login flow. WSO2 handles the first factor, then sends users to Authsignal to complete their MFA challenge before finishing sign-in.
The integration uses a Custom Authentication connection and an adapter hosted by Authsignal. You configure the connection in WSO2 and choose the authentication methods in Authsignal, which provides the enrollment and challenge screens.
This guide covers the setup and where Authsignal can help beyond login.
Why add Authsignal when WSO2 already has MFA?
WSO2 handles MFA and conditional authentication well. Both run inside the authentication flow, which means they evaluate the user at the point of sign-in. The gap opens after the session exists.
Consider a user who signs in successfully, then adds a new payout account. Login already passed, so there is nothing left for the WSO2 authentication flow to weigh. In Authsignal, that operation is an action, and every action carries its own policy. Payments, password resets, and changes to contact details each get their own rules. These flows need an integration in your application alongside the WSO2 login setup covered here.
WSO2 conditional authentication is configured as adaptive auth scripts, so changing a rule means editing code. Authsignal's no-code rules engine returns allow, challenge, review, or block. Rules read device and IP information plus custom data your application sends, such as a payment amount. Once those signals are connected, a fraud or product team adjusts the rules in the Portal and the change takes effect without a deployment.
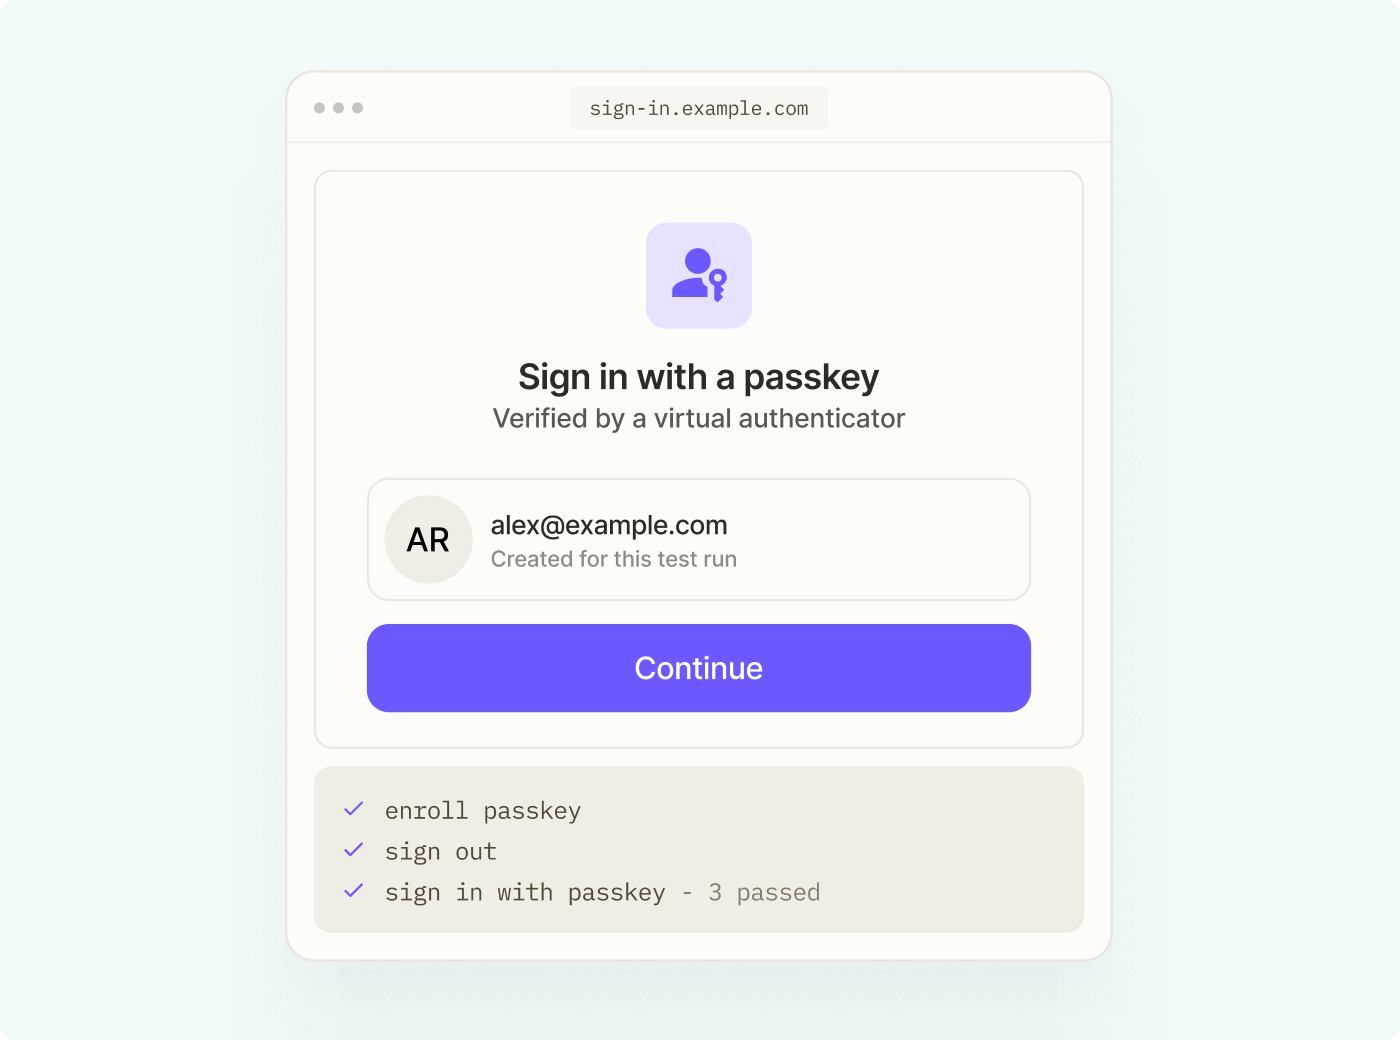
Different authentication methods sit in the same place: passkeys, OTP, WhatsApp OTP, push authentication, magic links, and face verification through biometric providers. Adding one is a configuration change rather than a new integration in the login flow.
How the integration works
When a user reaches the Authsignal step, WSO2 calls the hosted adapter. The adapter delegates the challenge to Authsignal, and the user is redirected to Authsignal's pre-built UI. After successful verification, the user returns to WSO2 to finish signing in.
You manage the available MFA methods in your Authsignal tenant. The WSO2 connection handles the handoff, so changing the methods you offer generally doesn't require editing that connection.
Before you start
You'll need:
- A WSO2 Identity Platform organization with an application already configured for login.
- An Authsignal tenant with at least one authenticator enabled.
Set up Authsignal
In the Authsignal Portal, open the Authenticators section and configure the methods you want to offer for MFA.
Then go to API Keys and copy your tenant's Server API key. You'll use it to authenticate requests from WSO2 to the adapter.
Create the Authsignal connection in WSO2
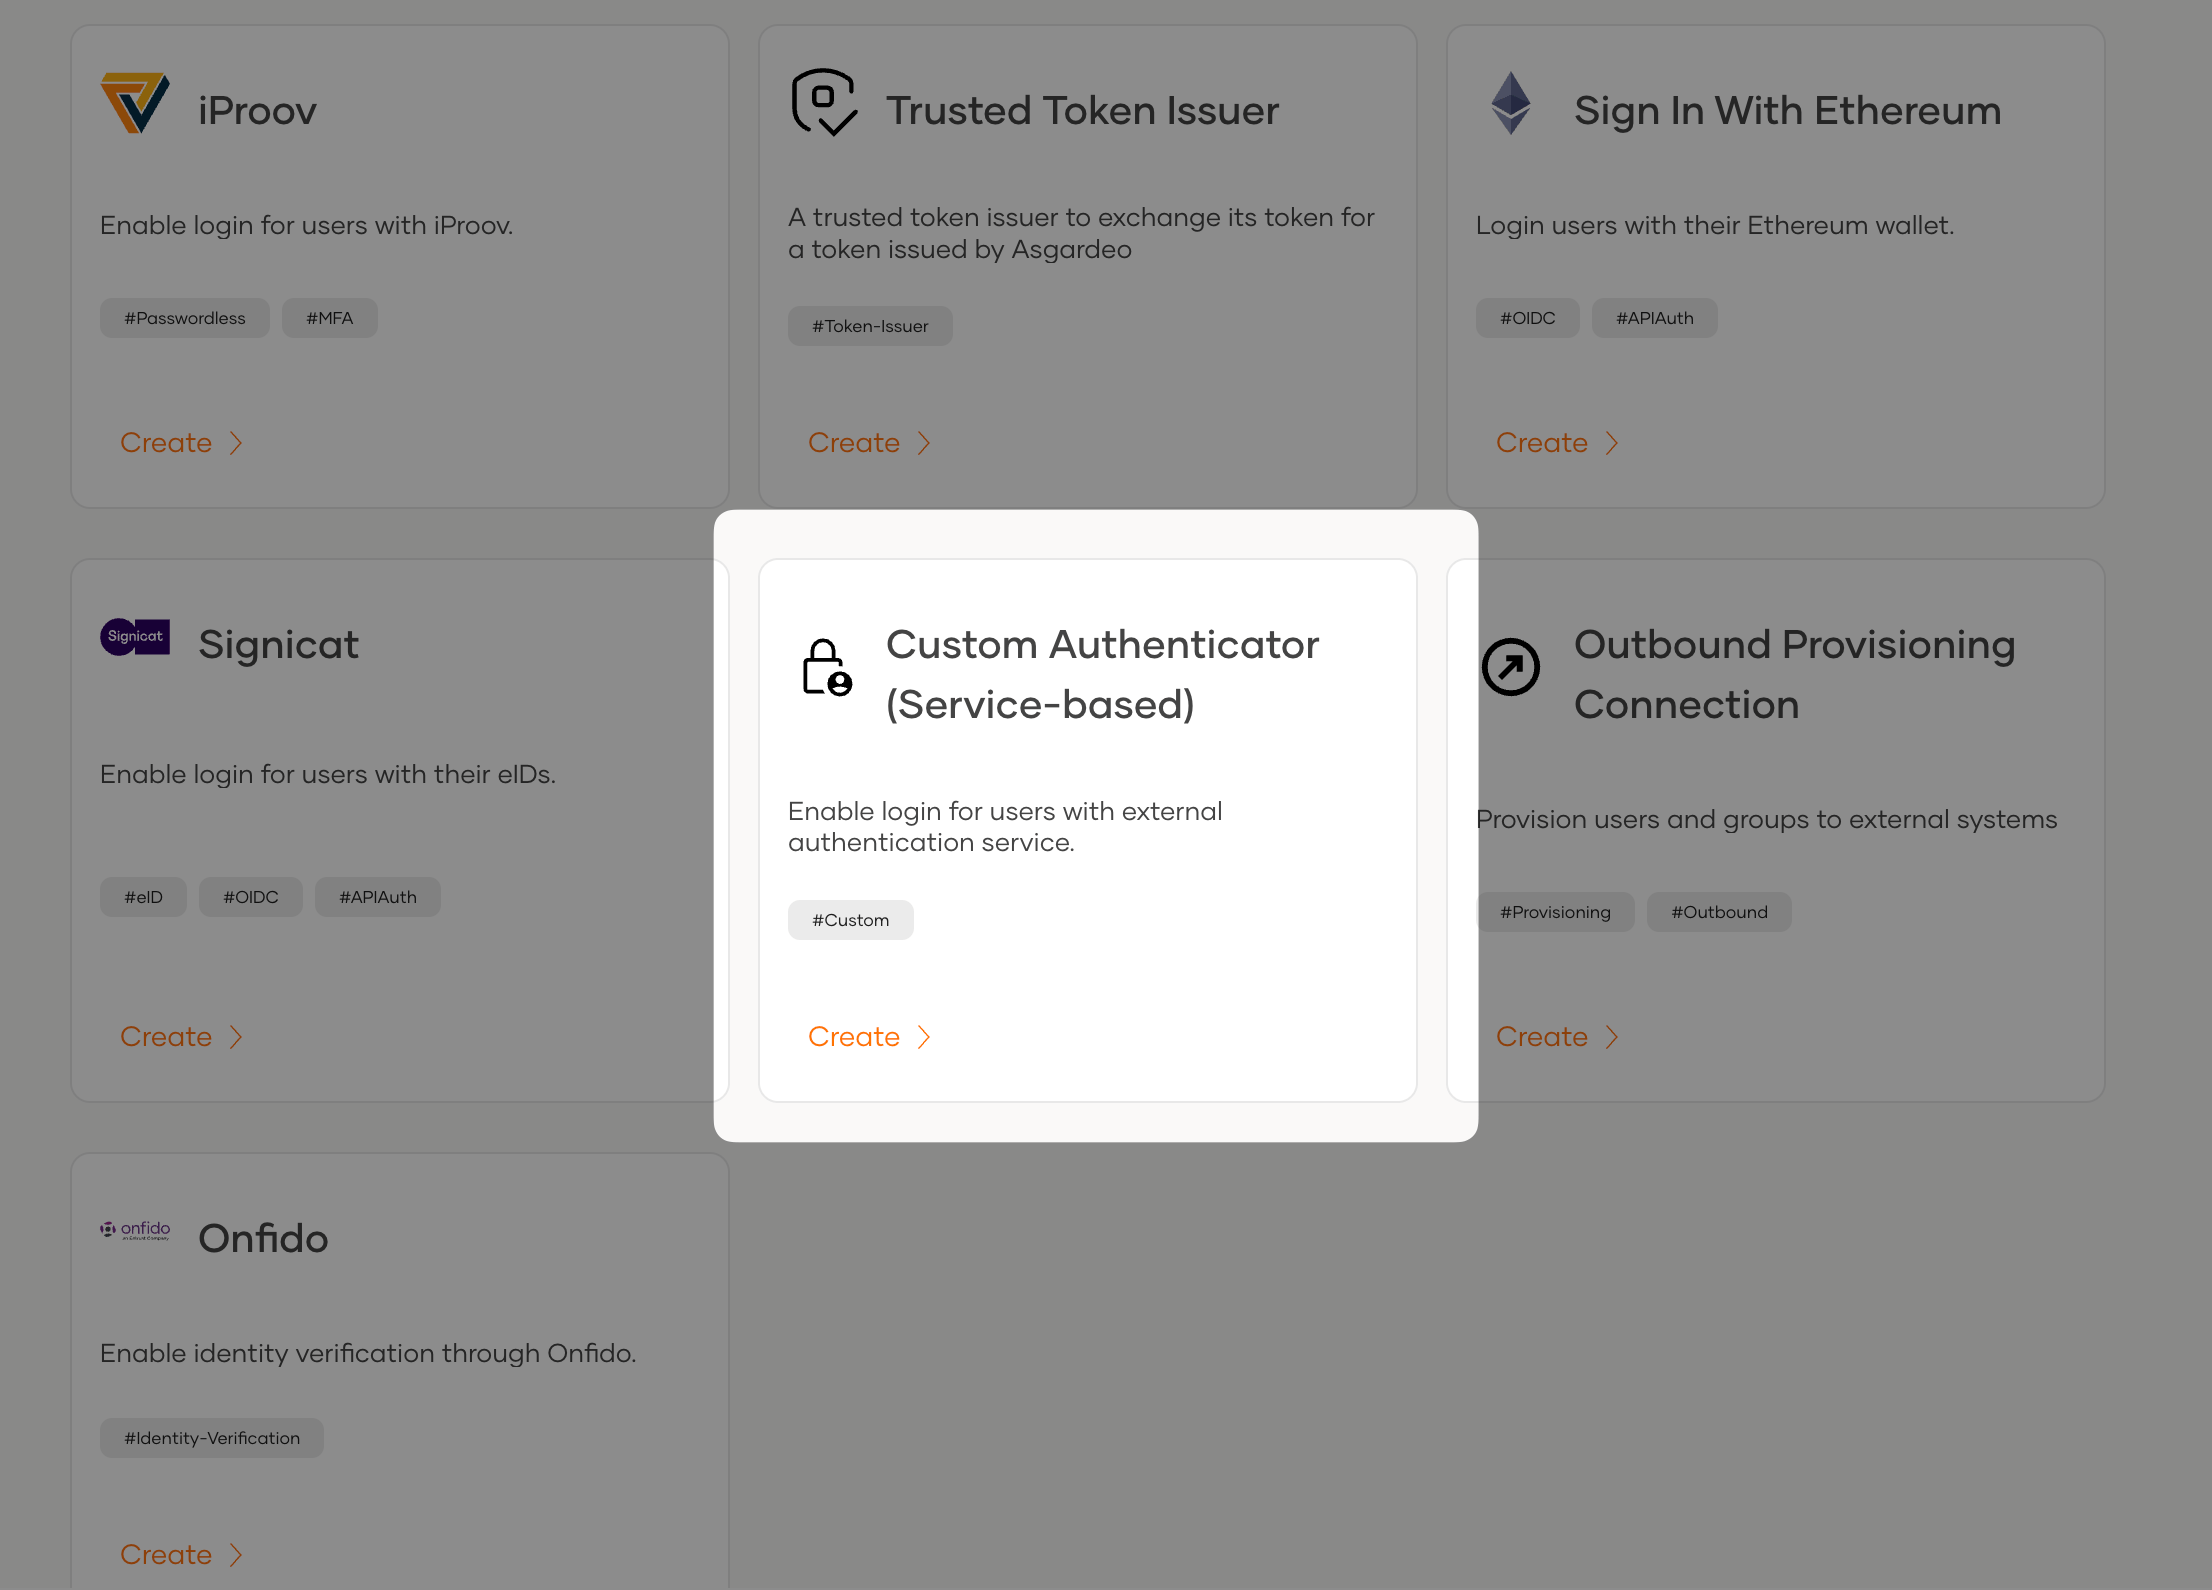
In the WSO2 Identity Platform Console, go to Connections → New Connection and choose Custom Authenticator (Service-based). This opens the Custom Authentication wizard.
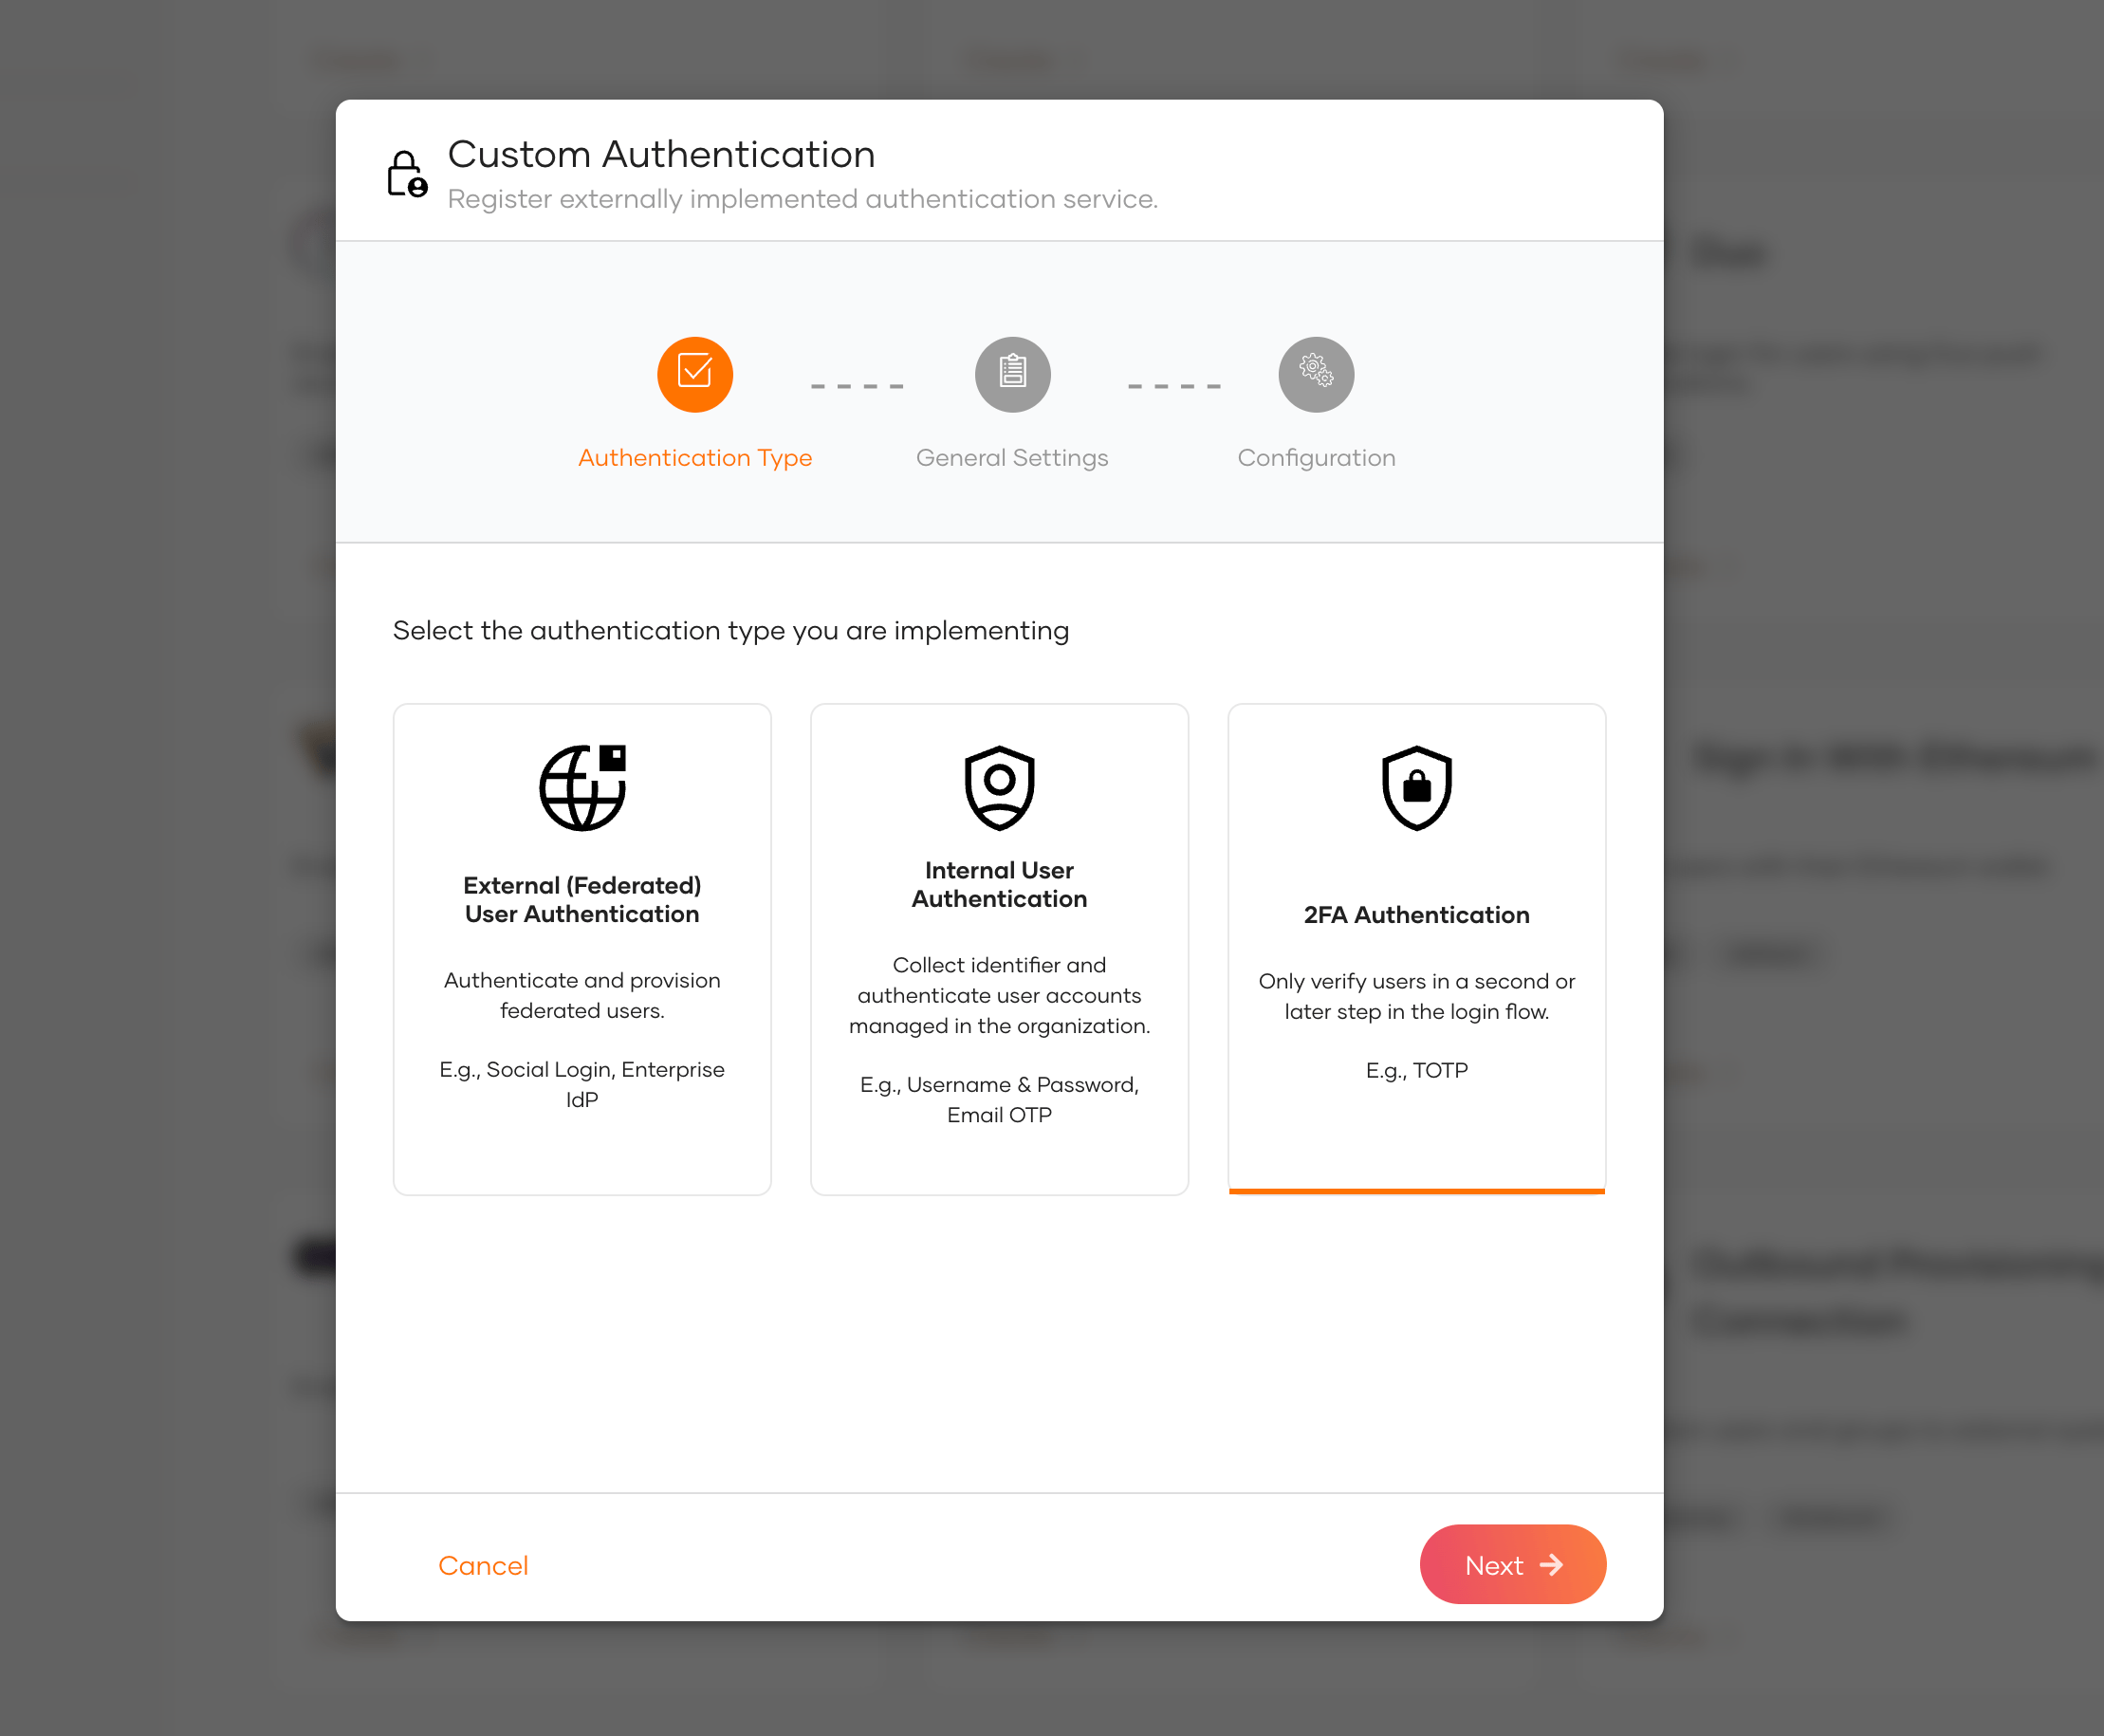
On the Authentication Type step, select 2FA Authentication and click Next.
Under General Settings, enter an Identifier and a Display Name. You'll select this connection when you edit the application's login flow.
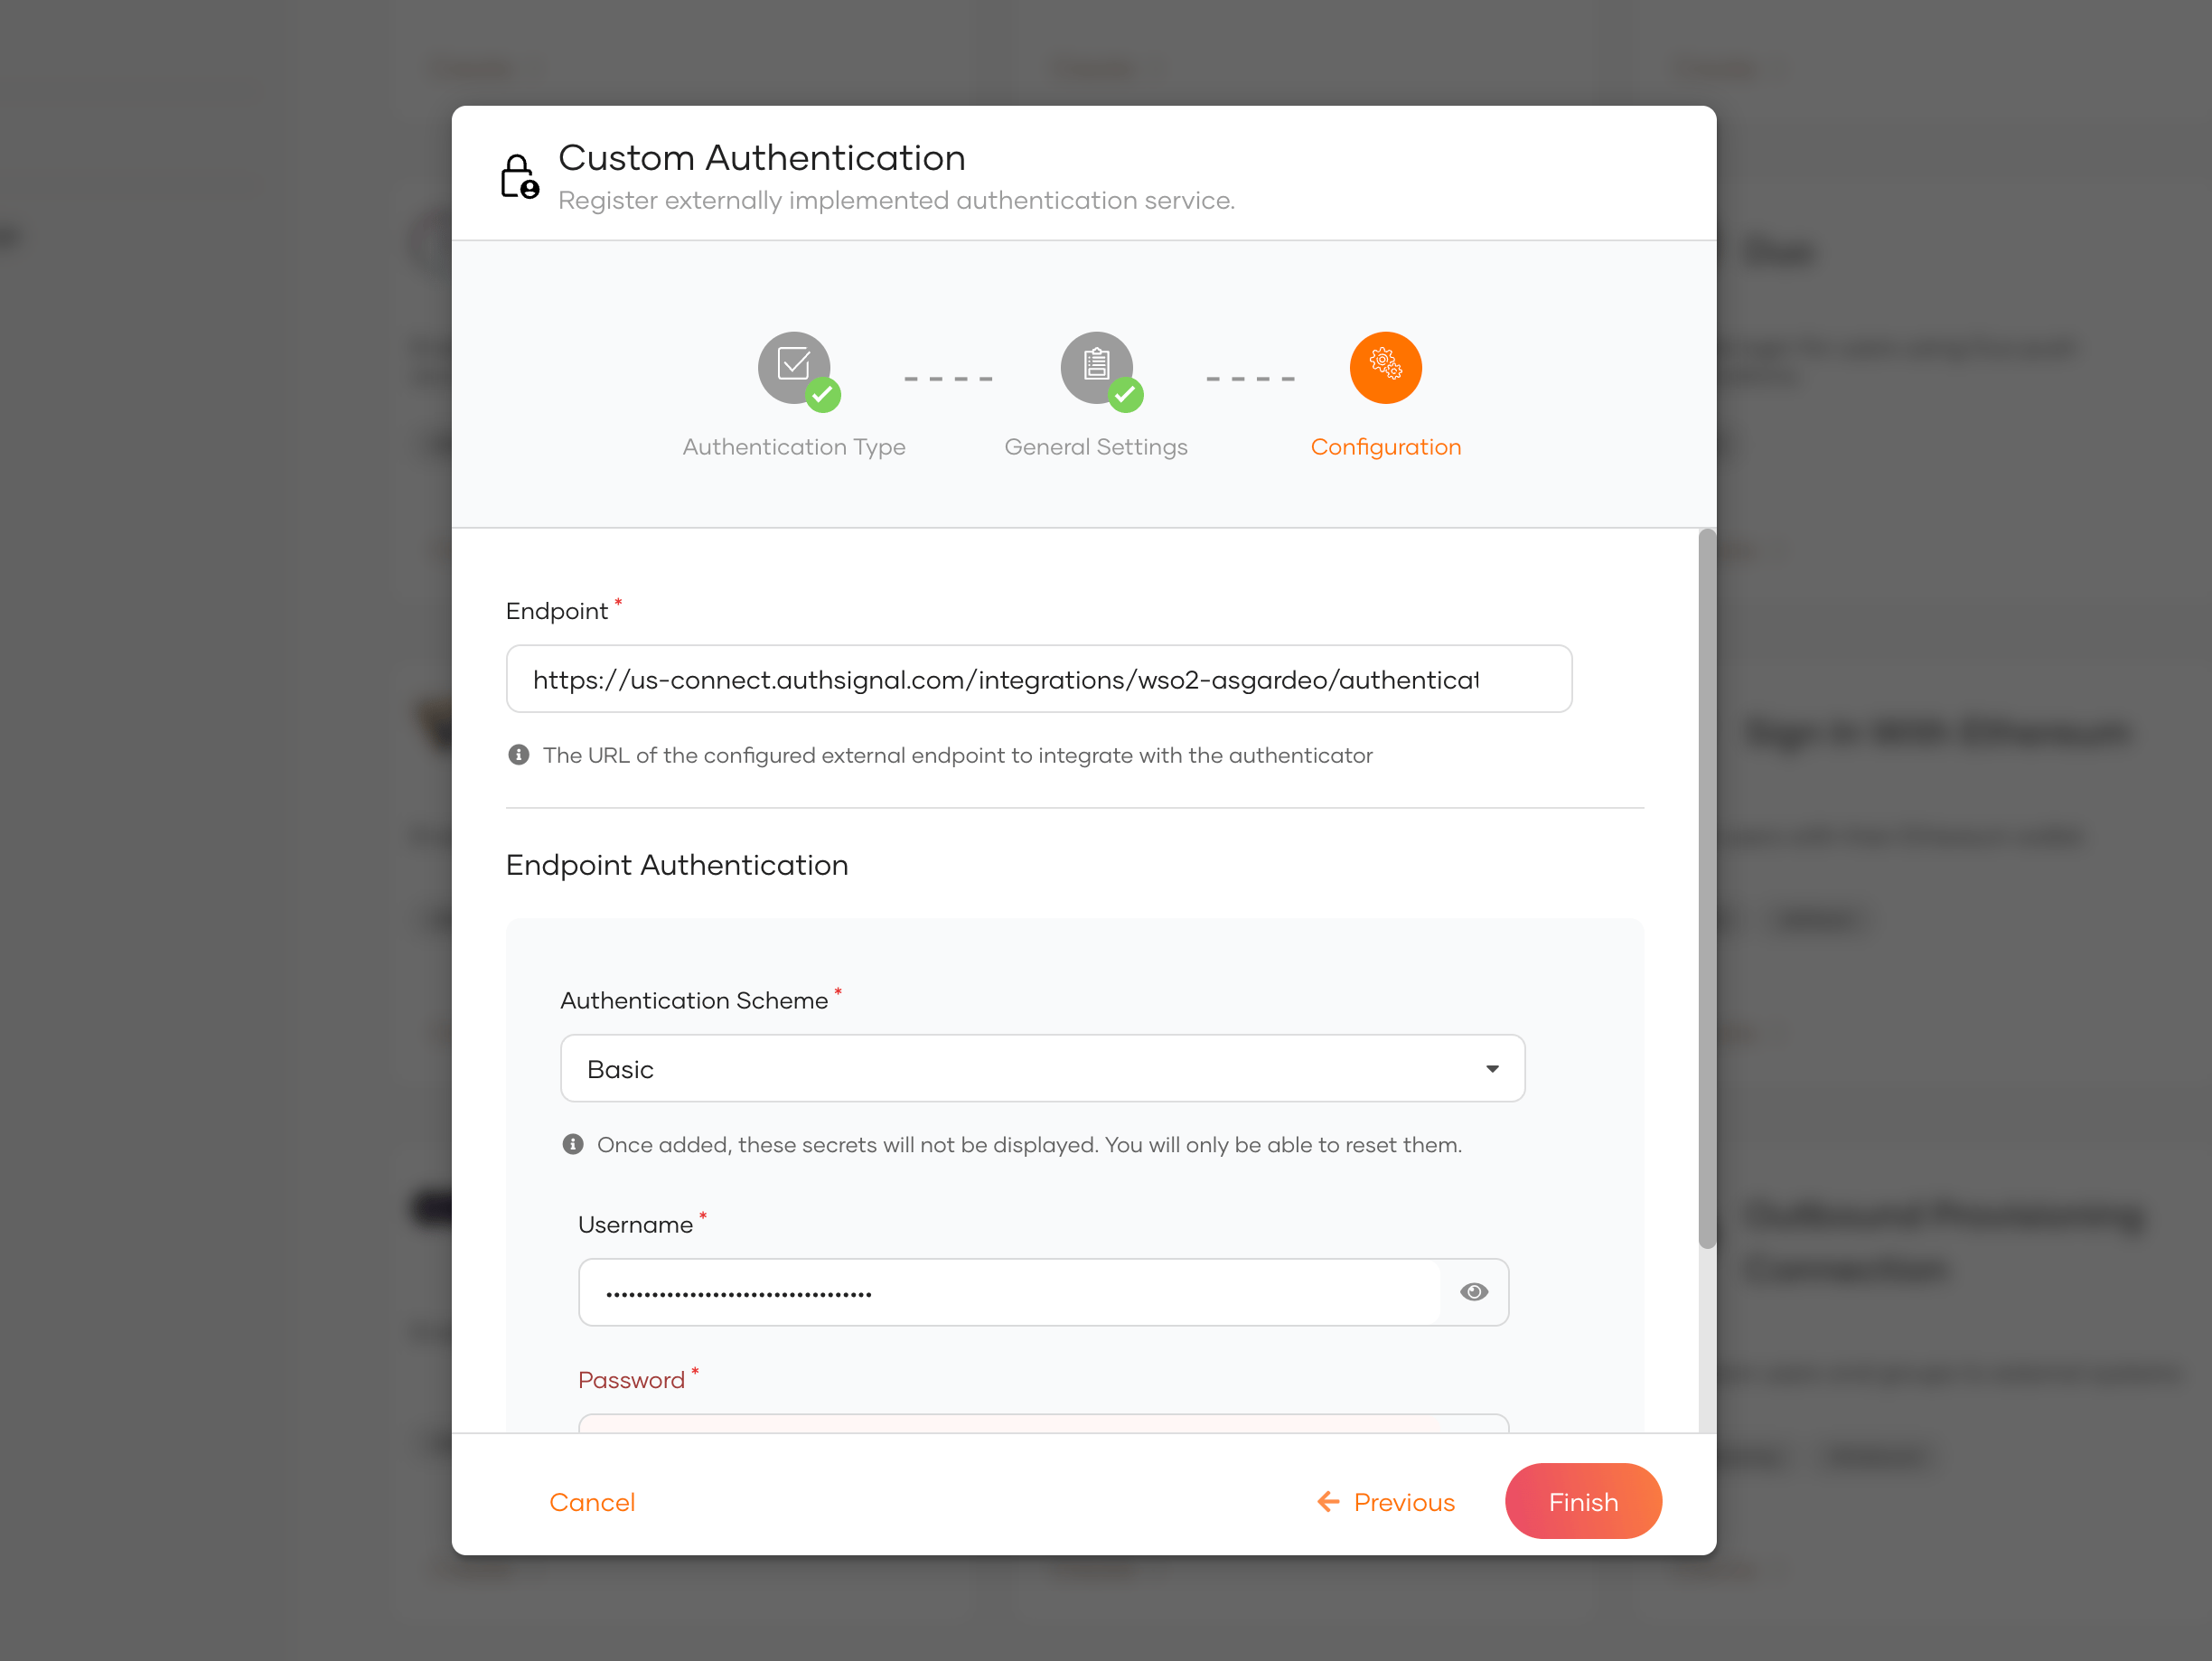
On the Configuration step, set the Endpoint to the adapter URL that matches your Authsignal tenant's region:
Under Endpoint Authentication, select Basic. Paste your Authsignal Server API key into the Username field.
The Password field needs a value because WSO2 requires it, but the adapter doesn't use it. Enter any non-empty placeholder, then click Finish.
Add Authsignal to your login flow
Go to Applications in the WSO2 Console and open the application you want to protect.
On the Login Flow tab, add a new step after your existing first factor, such as username and password. Add the Authsignal MFA connection to this new step, then click Update to save the flow.
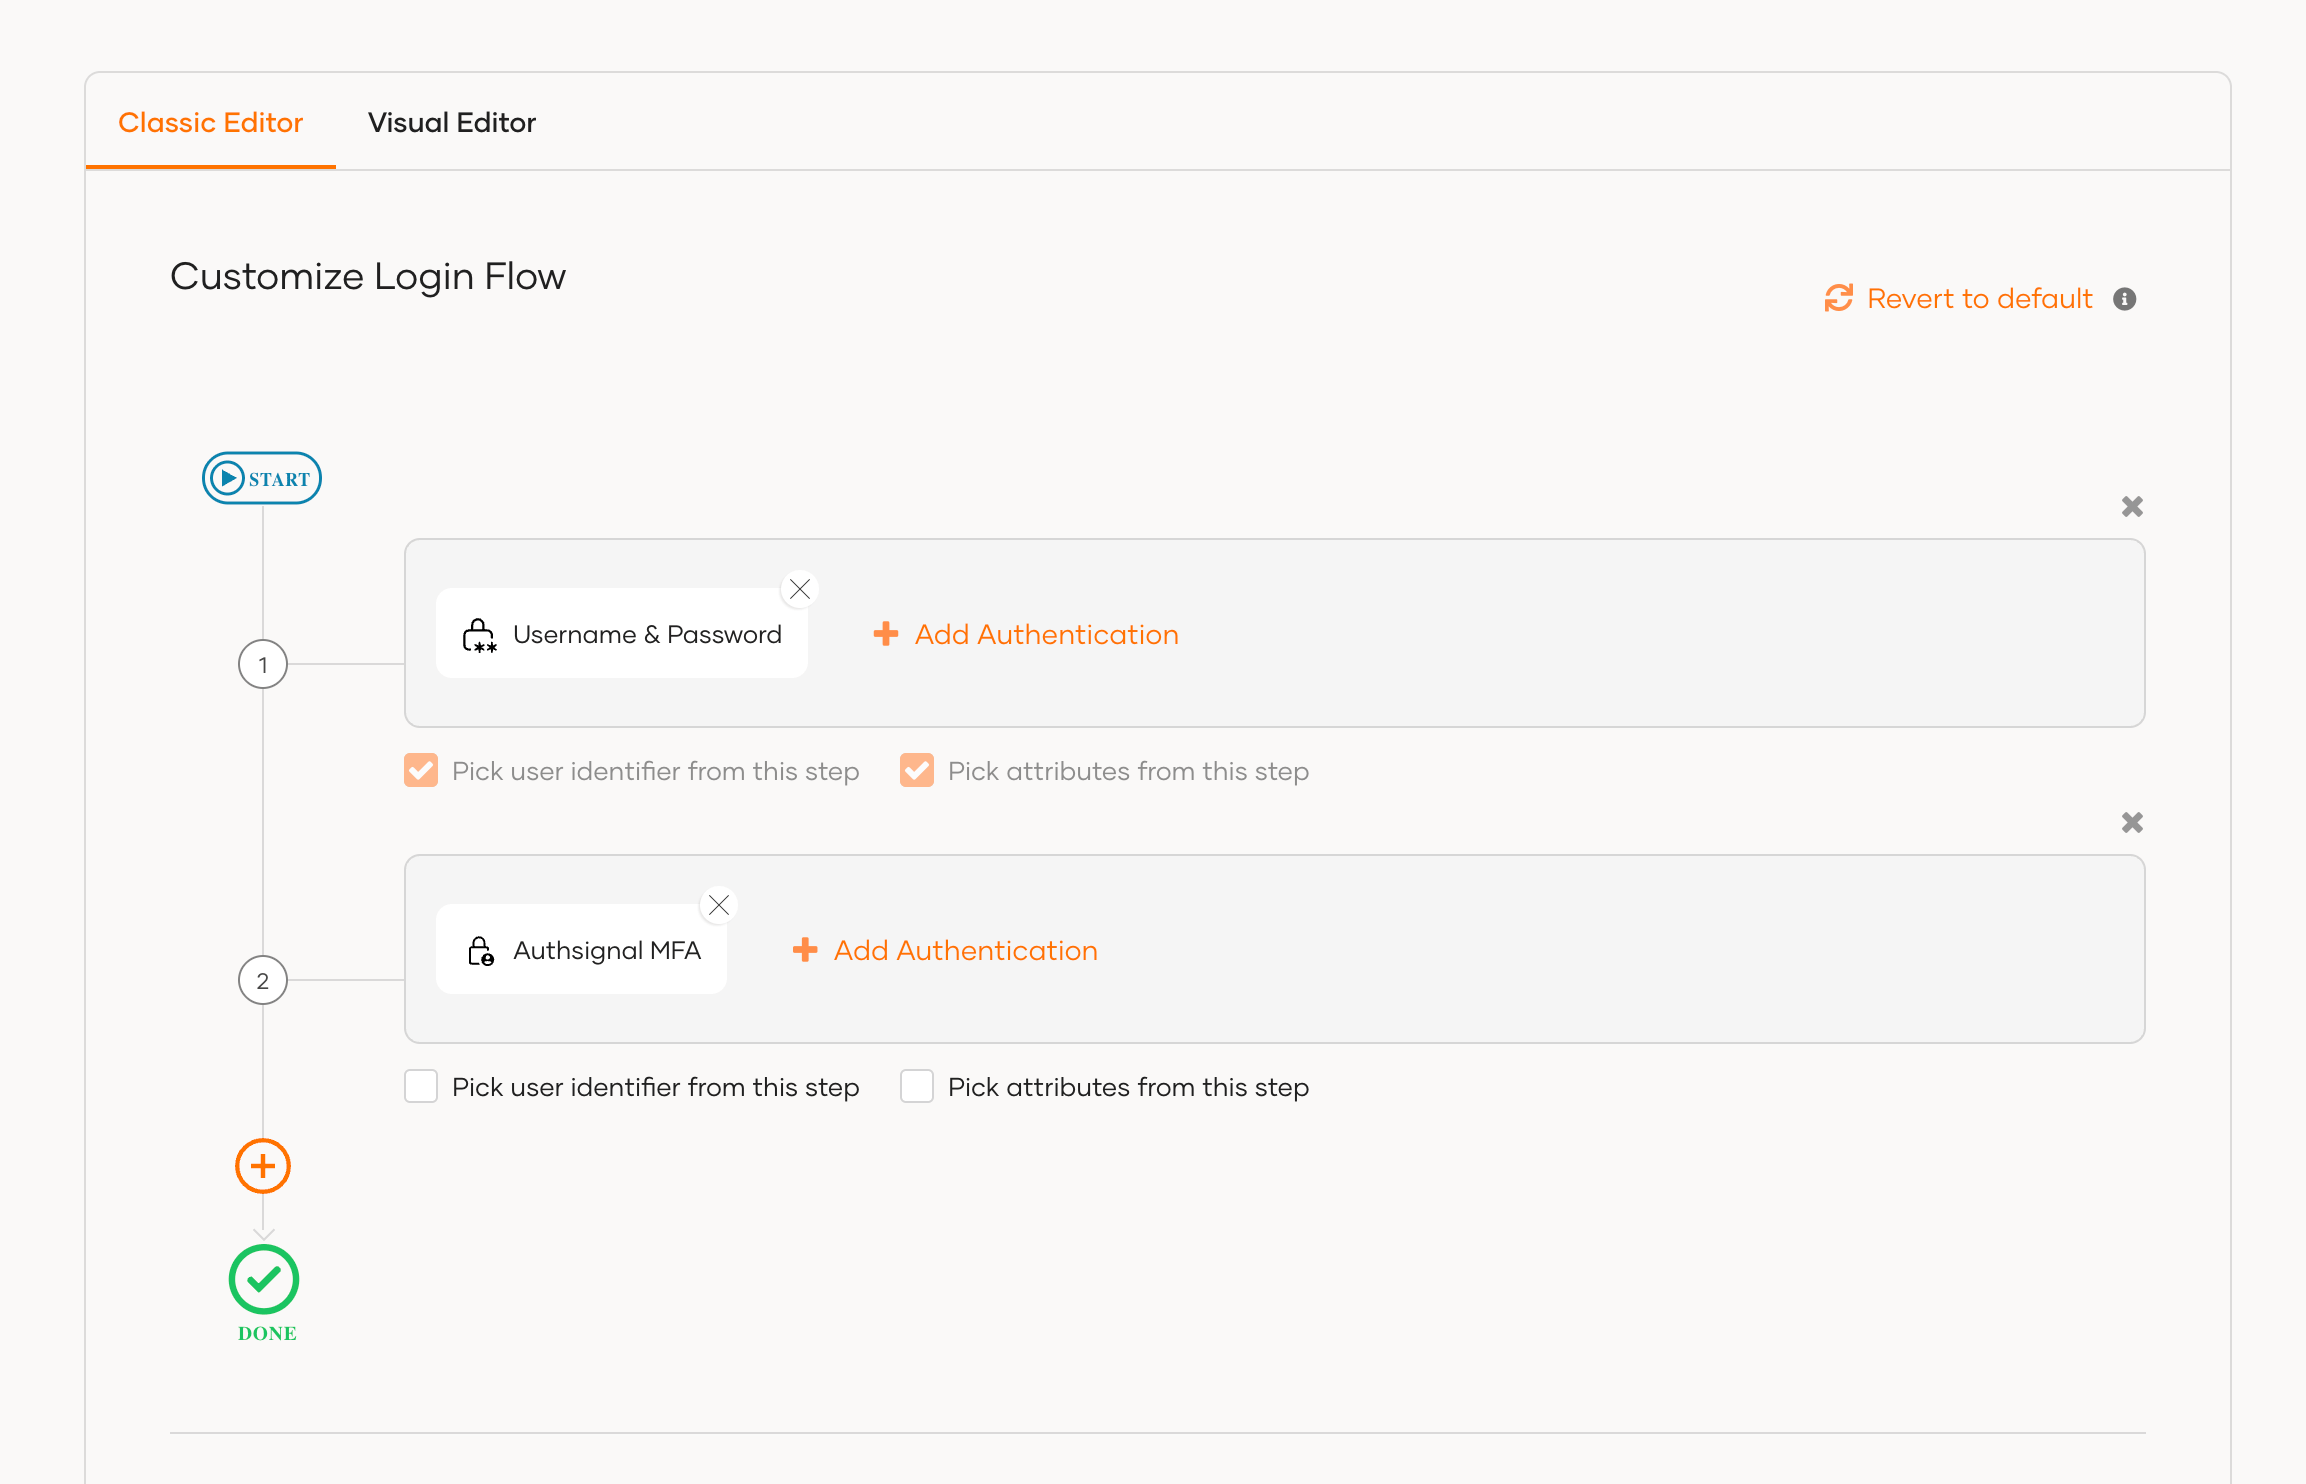
Authsignal now runs after the user completes the first factor.
Test the sign-in experience
Start a fresh sign-in to your application and complete the first factor. You should be redirected to Authsignal's pre-built UI to complete the MFA step, then returned to your application through WSO2.
Check the flow with a user who already has an authenticator enrolled and one who needs to enroll. Confirm that a successful challenge completes sign-in and that an unsuccessful challenge doesn't grant access.
As your requirements change, manage the methods you offer in the Authsignal Portal. You can configure passkeys or adjust your OTP options while keeping the same WSO2 connection and login step.
For more details on configuring the integration, see the WSO2 integration docs.